Angry IP Scanner

INTRODUCTION
- Angry IPScanner mostly used in windows , preinstalled in backtrack 4 r2 . And not installed in Backtrack 5 .
- Easy interface and user friendly tool .
- Angry IPScanner is a tool that is used to identify live or dead hosts in your lan or a any given range like 192.168.141.0 - 192.168.141.255 .
- With the help of angryipscan , you can access FTP, TELNET, PING, TRACEROUTE , whois , Geoip etc .Some of them are shown in this tutorial .
- See how to use this tool and learn it quickly with hackingDNA.com and again don't forget your Backtrack 4 , Because old is gold .
HOW TO OPEN ANGRYIP SCAN ON BACKTRACK 4
- To open Angry IPScan , follow the steps as shown below -
- Backtrack > Network Mapping > Identify Live Hosts > Angry IPScan
- See the below image for more details -
 |
| ANGRY IPSCAN PATH |
ANGRY IPSCANNER OPENED
 |
| ANGRY IPSCAN OPENED |
EXAMPLE 1 : SCANNING LAN
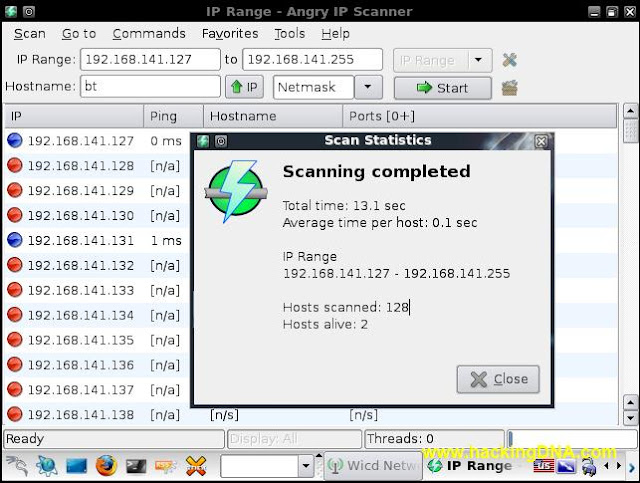
- Using this tool is so simple just enter the ipaddress range in the boxes as shown in the below images .
- Below it shows 192.168.141.127 is the starting range from where the scan will start , and it will continue till 192.168.141.255 .
- And one you enter the details just press the Start button .
- After scan is completed it display the messages on your screen and it gives a message how much time it take to complete , what is the ip range , how many host scanned and how many are alive in your range (as shown below )
- See the below image for more details -
 |
| SCANNING LAN WITH ANGRYIPSCAN |
EXAMPLE 2 : SCANNING LIVE NETWORK
- Ip address is hide due to privacy .
- The one changes we have done here is we select the netmask . We select " /16 " because the ip address is of class B .
- Those who don't know what are the classes of ipv4 then you must open your books now-
- See the below image ,in 3.8 min it scanned 3729 hosts and 1334 hosts are alive , it means it's a large network to scan and you can find lots of fishes for further process.
- See the below image for more details -
 |
| SCANNING LIVE NETWORK |
EXAMPLE 3 : SCANNING ANOTHER LIVE IP RANGE
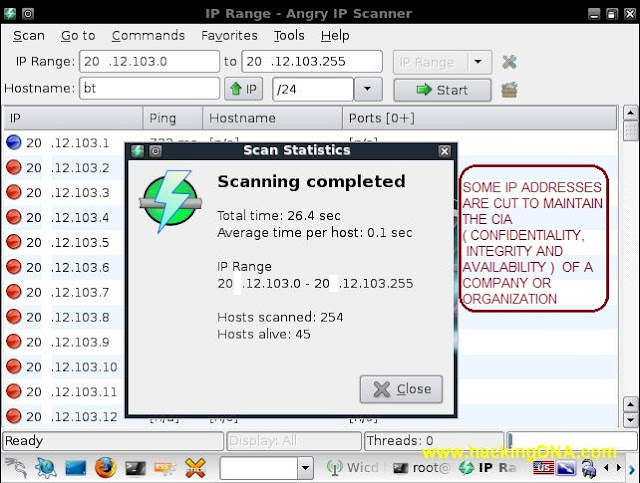
- Another class C address we are going to scan through angryip scanner , with minimum less the a 30 sec , it scan 254 hosts in the ip range and found 45 alive hosts on the network .
- See the below image for more details -
 |
| SCANNING LIVE IP RANGE |
EXAMPLE 4 : USING DIFFERENT SERVICES
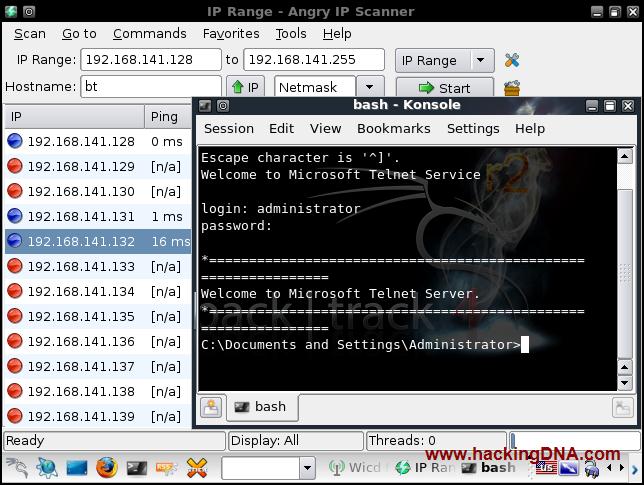
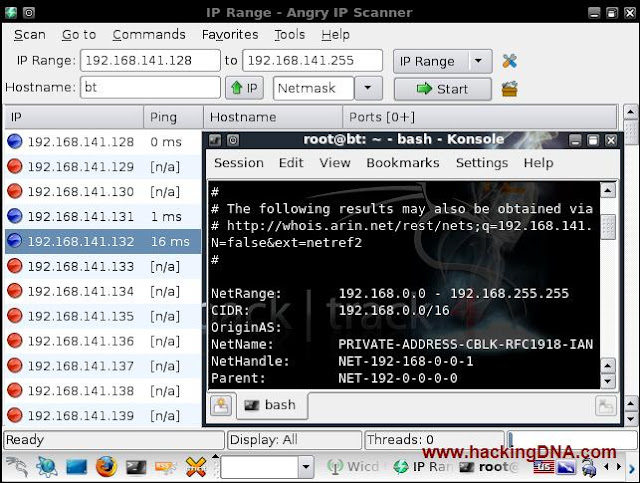
- Through angryip scanner we can use different services like FTP, Telnet, Ping, Trace route , SSH , whois , Geo locate , Email Sample etc .
- See the below image for more details -
 |
| ANGRY SCAN SERVICES |
EXAMPLE 5 : HOST TELNET SERVICE

EXAMPLE 6 : PING
 |
| PING WITH ANGRY IPSCAN |
EXAMPLE 7 : TRACEROUTE
 |
| TRACE ROUTE WITH ANGRY IPSCAN |
EXAMPLE 8 : WHOIS
 |
| WHOIS WITH ANGRY IPSCAN |
EXAMPLE 9 : Geoip Locate
 |
| GEOIP LOCATE WITH ANGRYIPSCAN |
EXAMPLE 10 : FETCHER OPTIONS
- To open fetchers , goto tools > Fetchers (as shown below )
 |
| FETCHER OPTIONS |
- Once window os pop-up select your all options from Available fetchers ( Right side ) and put it into Selected fetchers ( left side) and press OK .
- In my case , i have added all the options except comment .
- See the below image for more details -
 |
| SELECT FETCHER OPTIONS |
- Now when i run angryip again and right click on the selected ip and when i clicked on the details , it pop-up all the ip address details as shown below -
 |
| GEO IP LOCATE WITH ANGRY IPSCAN |
EXPORTS ALL RESULTS
- At the end , when you are done with the angry ipscanner you can export your all results in different formats like txt, csv,xml and lst .
- See the below image , in my case i have save my results in .txt format .

NOTE : THIS IS FOR EDUCATIONAL PURPOSE ONLY !! I M NOT RESPONSIBLE FOR ANYTHING YOU DO
|


0 comments:
Post a Comment